HOW TO
Learn how to prepare before printing,
how to hold a squeegee, and how to use the basic printing method.
Preparation
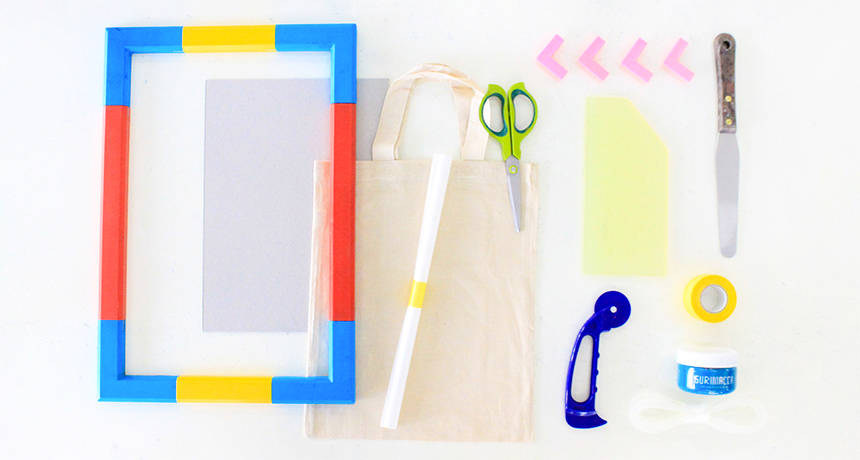
Good preparation is the key to successful printing.
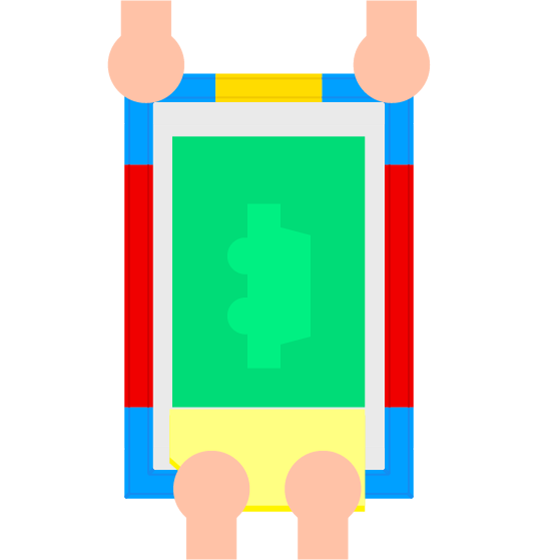
❶ SURIMACCA KIT / frame to hold a screen
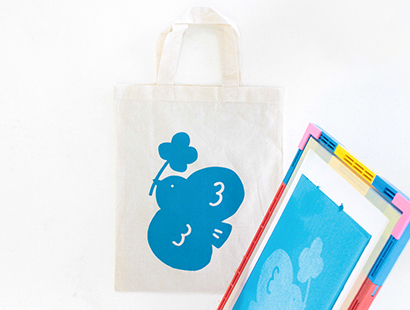
❷ Screen / artwork printed on a screen
❸ Ink / water-based ink is prefered
❹ Squeegee / rubber blade
❺ Material to be printed / of your choice
❻ Spoon or Spatula / to scoop ink
❼ Board / to keep screen and material flat and even
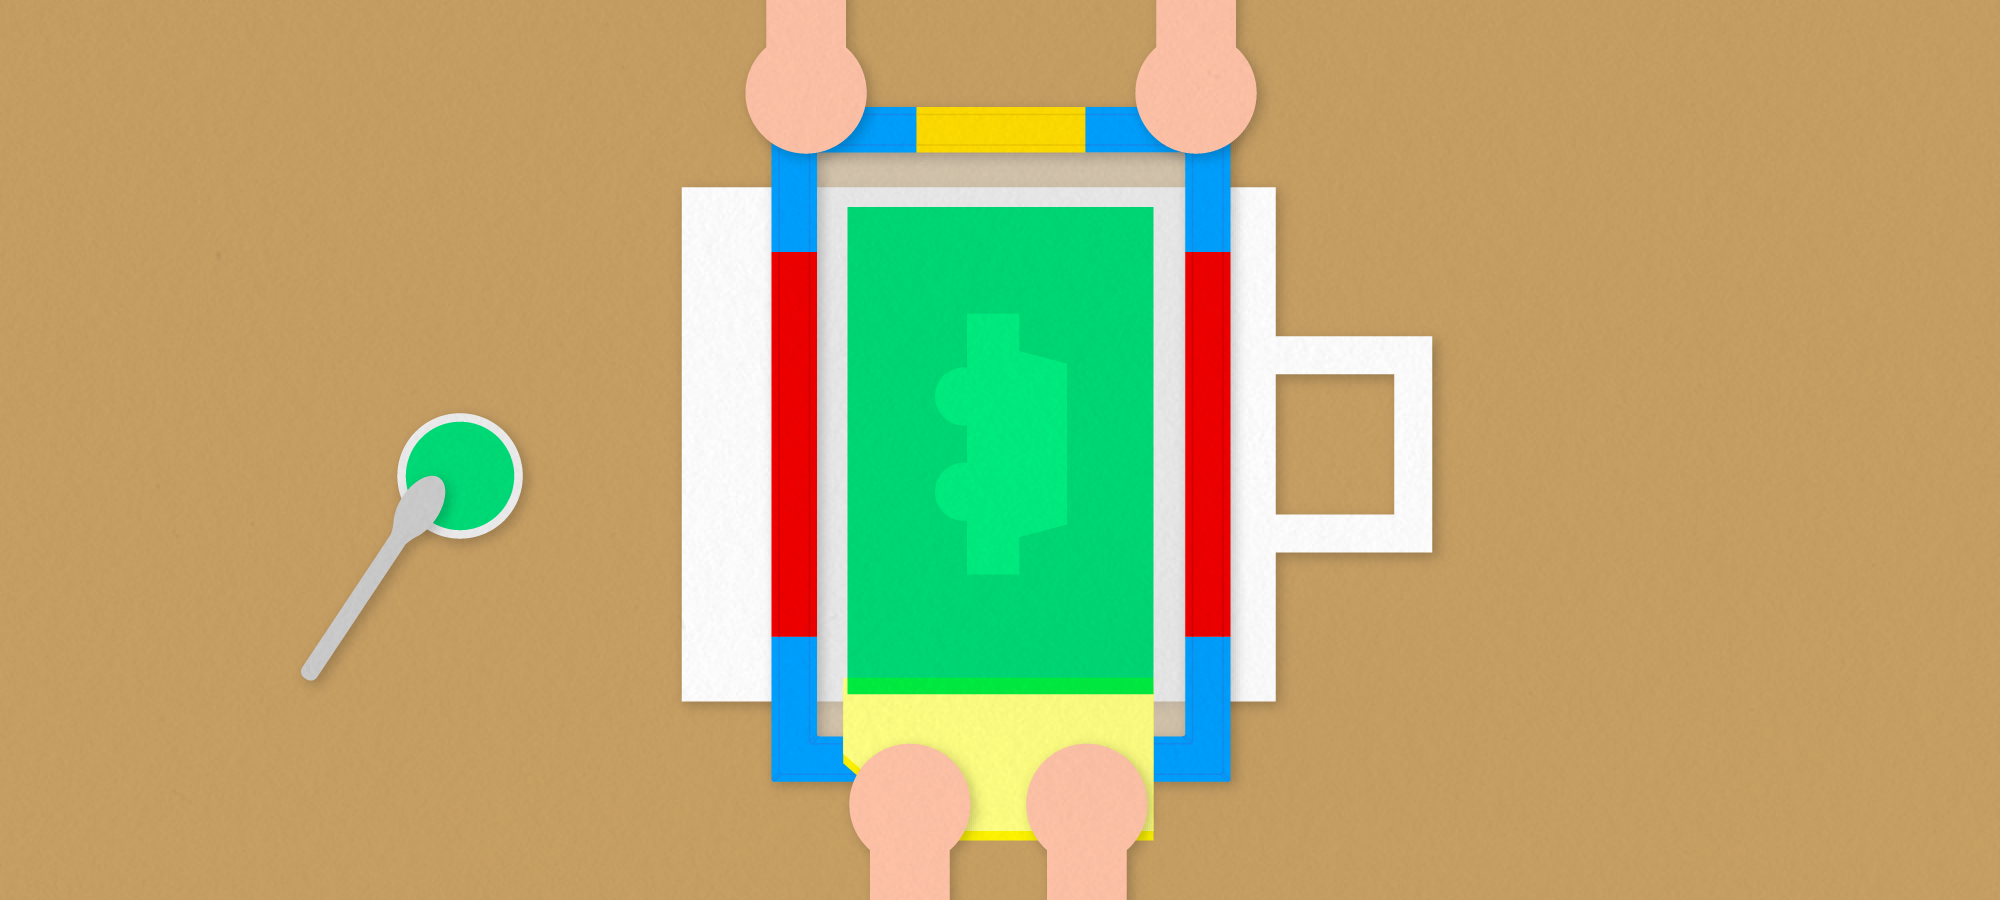
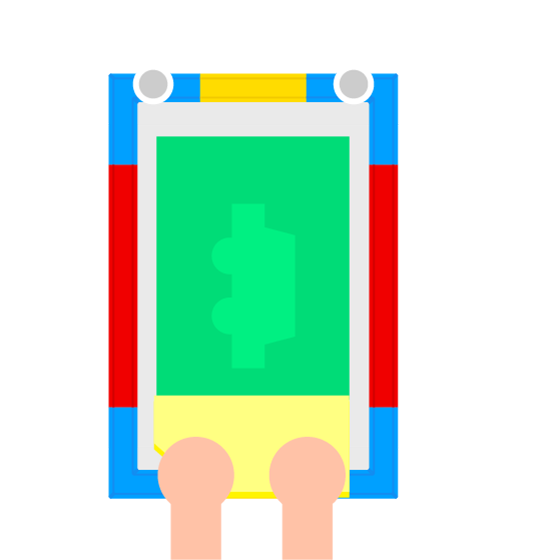
Squeegee

Each edge with a different width
SURIMACCA Squeegee has 5 edges which are all different widths.
Choose the suitable grip position, so that the edge of the squeegee covers the whole artwork. It is made of urethane and has 15mm(⅔ inch) thickness.
Check ONLINE STORE
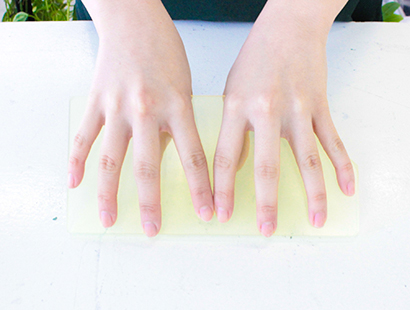
How to hold
Since the squeegee does not have a wooden support like a normal squeegee, the amount of pressure that can be applied depends on how and where you hold it.
Spread your fingers a little and hold the squeegee as low as possible so that the pressure is evenly applied to the entire squeegee.

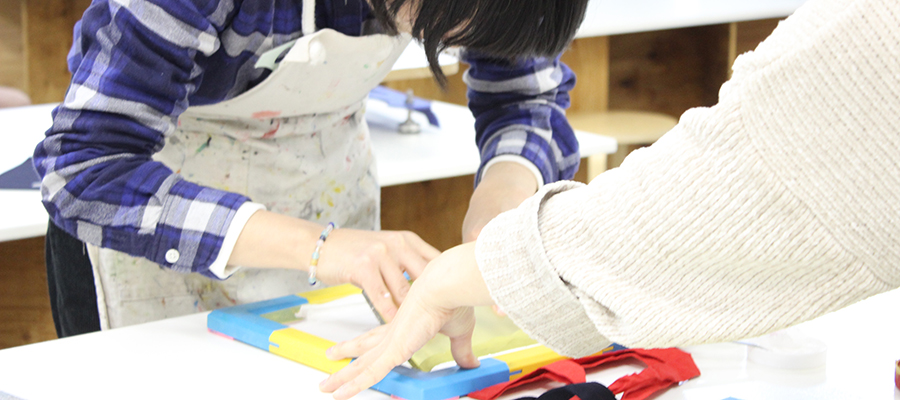
There are various ways to print
There is not just one printing method for screen printing.
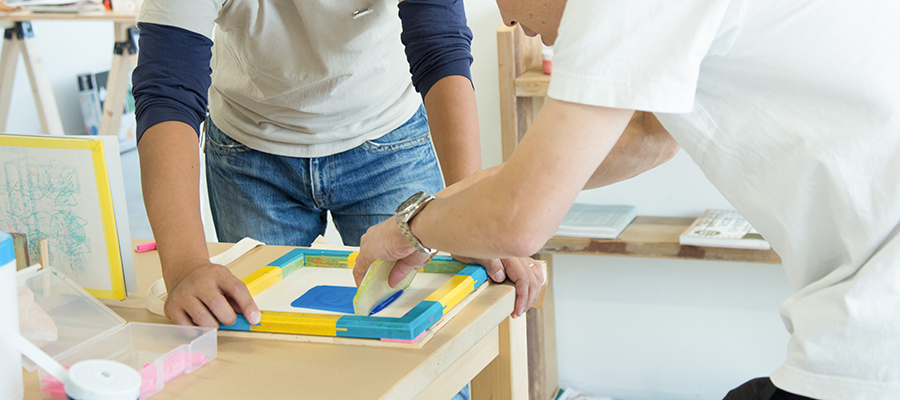
If you are printing a small image, you can hold the frame with one hand and hold the squeegee with another hand. If you are printing a large image, you can work with someone for help, or use a holder. Find the best way of printing for yourself, depending on the size and the material you are working with.
Print with one hand holding a frame
Use one hand to hold a frame in place and use another hand to print.
Print with another person
Ask someone to hold a frame in place from the opposite side and print.
Use a holder to print.
Fix a frame, using a SURIMACCA holder and print.
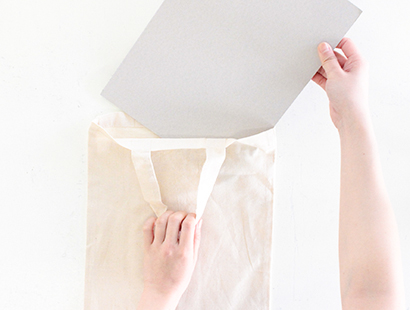

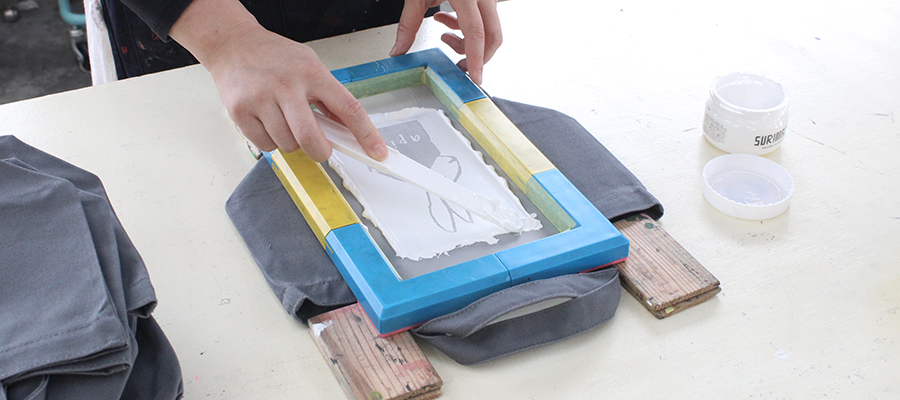
1Insert a board inside.
When printing on a T-shirt or thin fabric bag, insert a board inside to prevent ink from going through to the other side of the fabric. You can use paper board or plastic file folders for this. Rough boards like cardboard would affect the print quality as it has a bumpy surface, so please use something smooth and flat.
Inserting a board can also make the area to be printed flat, and even level. A bag with a gusset often has uneven thickness, so we recommend using a thick board to flat out the printing area.
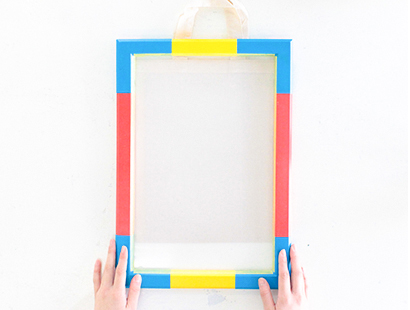
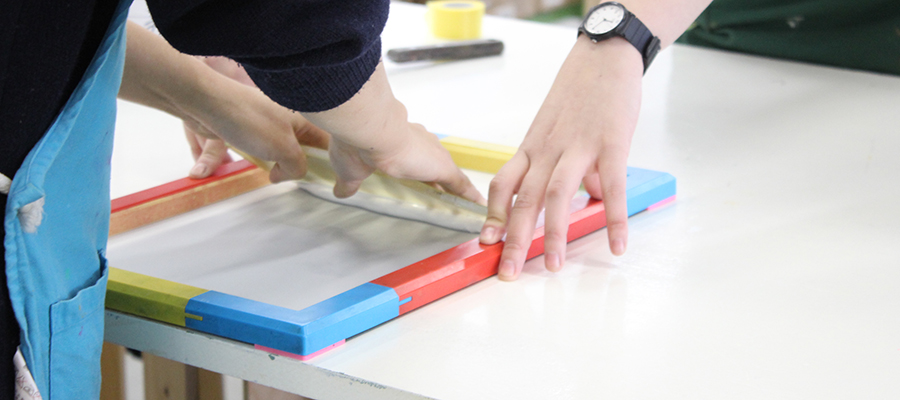
2Registration
Place the prepared SURIMACCA on where you want to print.
When you are on this step, make sure that the SURIMACCA and the material to be printed are parallel to each other before printing. If they are not, ink would not pass through the screen evenly and cause ink bleeding or faint images.

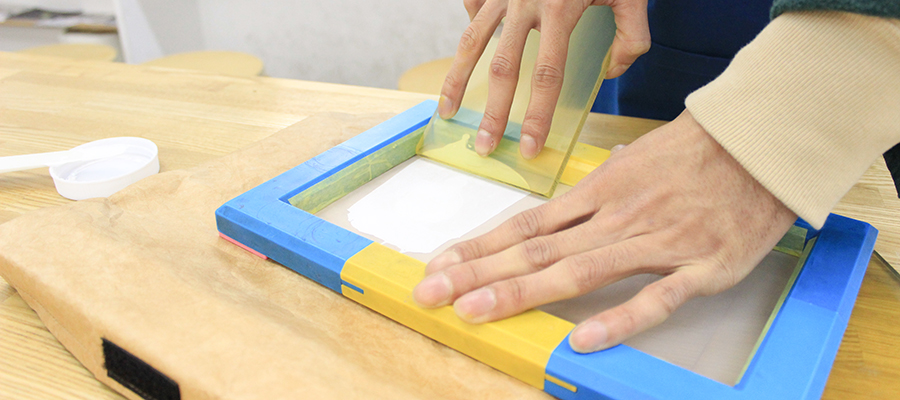
3Put ink on the screen
Mix ink well before using. We do not recommend using inks that are too old as they might cause clogging on a screen. If the ink is hard and clumpy, it is better not to use it.
Put ink directly onto the screen. Put a generous amount of ink, as if it is too little, you will end up with fainted, incomplete images. Even if you place a lot of ink, it does not mean that you will use it all up in one go. You can reuse the ink that is leftover from the print.
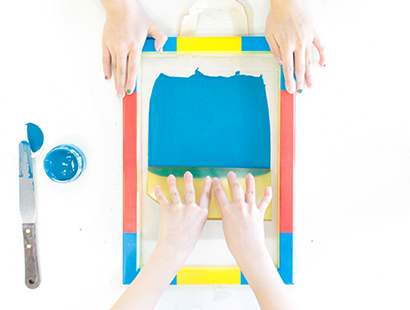
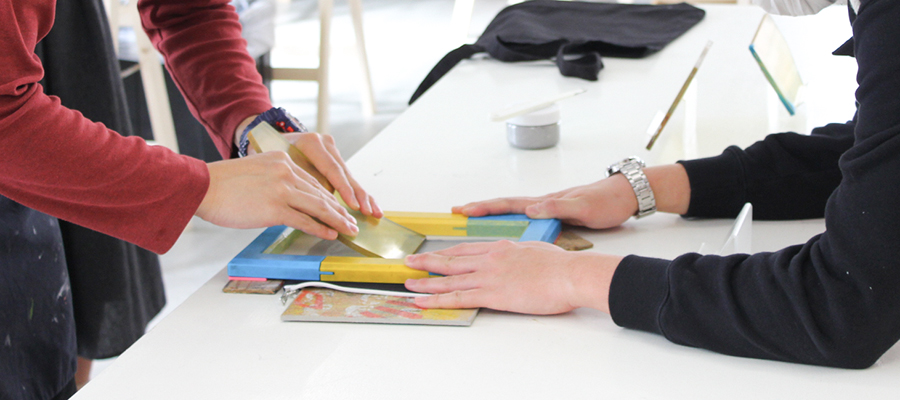
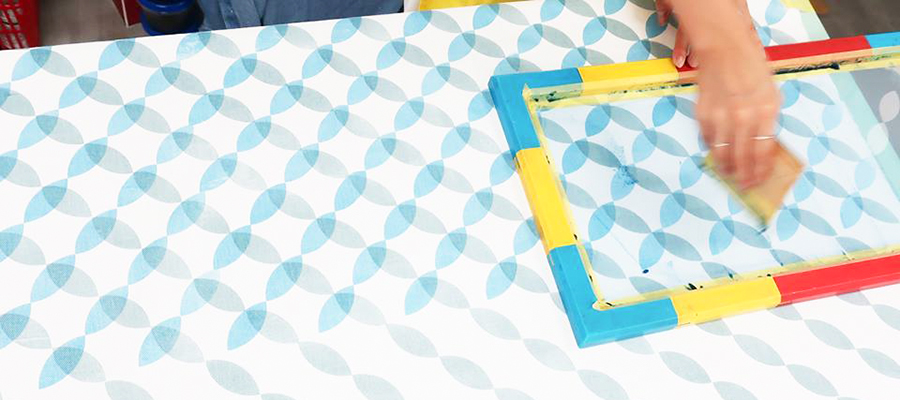
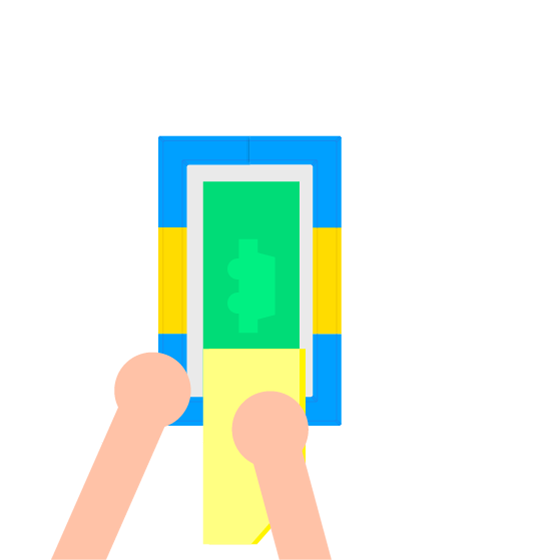
4Pull the squeegee towards you
Keep the angle of the squeegee at 45 degrees and pull it towards you with a constant pressure and speed. A good indication of a clean print is when you can see a clear artwork in the area where the squeegee passes, on the screen.
Adjust the number of times you print, the amount of force, and the angle according to the artwork and material.
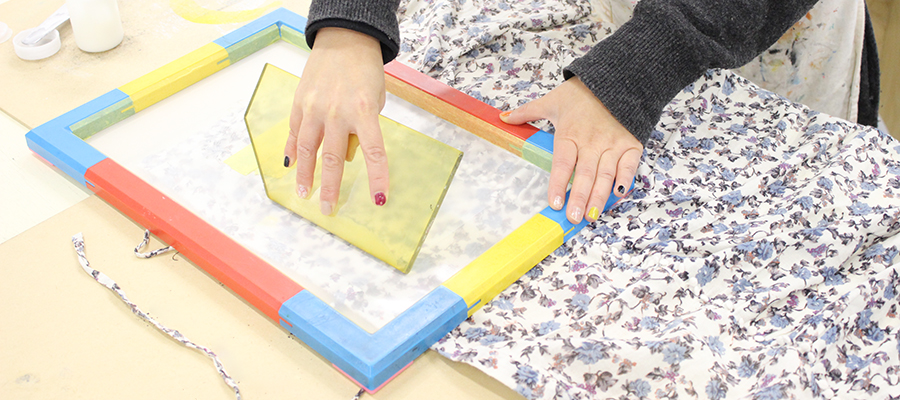
5Lift the frame slowly
Lift the frame slowly, once you are done pulling a squeegee. If you are printing paper or a thin, light material, or if the design has a large printing area, it may stick to the screen. If it shifts when removing, the ink will be dragged and the result will look smudged, so remove it carefully.
Although SURIMACCA ink cures by air-drying, it takes longer time to dry than other inks because of its slower drying speed. Please refer to the following page for drying methods using a hair dryer or an iron.
Go to “Let it Dry”Watch Video

HOW TO SURIMACCA
“Let’s Print”
Introducing SURIMACCA related contents in the videos. Here is how to print. Please take a look as your reference.
Watch on YouTube